E-Bike LCD Display Manual: A Comprehensive Guide
This manual provides essential guidance for e-bike owners and technicians, covering display functionality, troubleshooting, and maintenance. Ensuring a fully charged battery is crucial for optimal display operation.
E-bike LCD displays have become integral components, offering riders crucial real-time data and control. These displays evolved from simple indicators to sophisticated interfaces, enhancing the riding experience and providing valuable insights into the e-bike’s performance. Modern displays present information like speed, battery level, assistance mode, distance traveled, and often, power output.
Understanding the display is key to maximizing your e-bike’s potential. A functional display ensures safe and informed riding, allowing adjustments based on conditions and rider preference. Common issues, such as a display not turning on, can often be resolved with basic troubleshooting steps, like checking battery charge and connections. Regular maintenance and occasional software updates contribute to long-term reliability.
This guide aims to demystify e-bike LCD displays, providing a comprehensive resource for users of all levels. From identifying different display types to resolving common problems, we’ll cover everything you need to know to keep your display functioning optimally.
Understanding Common Display Types
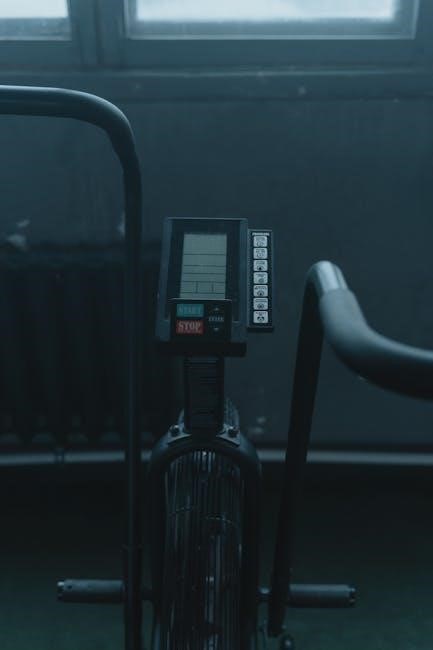
E-bike LCD displays vary significantly in features and complexity. Basic models typically show speed, battery level, and assistance mode, utilizing simple segmented displays. Intermediate displays incorporate backlit LCD screens, offering improved readability and additional data like trip distance and average speed.
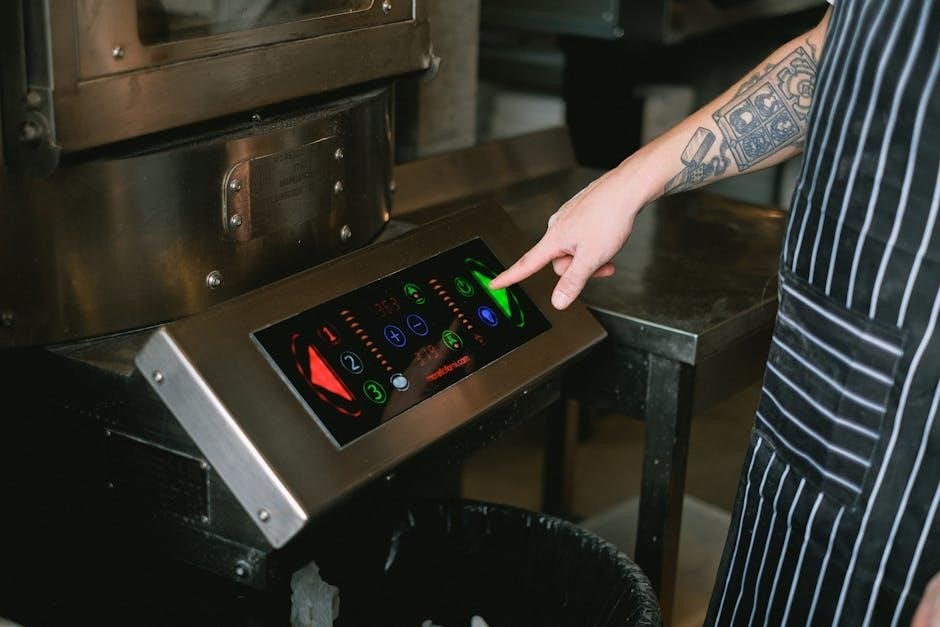
More advanced displays feature full-color TFT (Thin-Film Transistor) technology, providing vibrant graphics and customizable interfaces. These often include Bluetooth connectivity for smartphone integration, allowing access to detailed ride statistics and firmware updates. I2C LCD integration, commonly used with VESC controllers, enables custom data displays via Arduino-based projects.
The choice of display depends on rider needs and budget. Simpler displays are cost-effective and reliable, while advanced options offer enhanced functionality and personalization. Understanding these differences helps in selecting the right display or troubleshooting existing ones.

Key Information Displayed on E-Bike LCDs

E-bike LCDs present a wealth of crucial riding data. Speed is prominently displayed, often in both miles per hour and kilometers per hour. Battery level, indicated by a percentage or bar graph, is vital for range estimation. Assistance mode, showing the current power level, allows riders to adjust effort.
Trip distance and total distance (odometer) track ride progress. Average speed and maximum speed provide performance insights. More advanced displays show power output, cadence (pedal rotation rate), and error codes for troubleshooting.
Connectivity features enable data transfer to smartphones, expanding displayed information. Regularly checking these metrics enhances the riding experience and helps maintain optimal e-bike performance.
Powering the Display: Battery Considerations
E-bike LCD displays rely directly on the battery’s power. A fully charged battery is paramount for consistent display functionality. Low battery levels can cause the display to malfunction, flicker, or shut off entirely, hindering access to vital riding information. Regularly check the battery charge before each ride to avoid unexpected display issues.
Ensure the battery is properly connected and secured. A loose connection can interrupt power supply. Consider the battery’s age and condition; older batteries may have reduced capacity and struggle to power the display effectively. Maintaining a healthy battery is crucial for reliable display operation and overall e-bike performance.

The Impact of Low Battery on Display Function
A depleted e-bike battery significantly impacts LCD display performance. As the battery discharges, the display may exhibit flickering, dimming, or incomplete readings. Critical data like speed, distance, and battery level itself can become inaccurate or disappear altogether. In severe cases, the display may shut down completely, leaving the rider without essential information.
Low battery voltage can also cause erratic display behavior, such as incorrect error codes or frozen screens. This can be misleading and potentially unsafe. Prioritizing battery charging and monitoring its level are vital to ensure consistent and reliable display operation. A fully charged battery guarantees accurate data and a safe riding experience.
Display Connections and Wiring
Proper display connections are fundamental for reliable operation. E-bike LCDs typically connect to the controller via a multi-pin cable, often utilizing a proprietary connector. Ensure this connection is secure and free from corrosion. Inspect the wiring harness for any signs of damage, such as frayed wires or loose connectors. A stable connection guarantees accurate data transmission between the display and the controller.
Before troubleshooting, verify the cable is fully seated in both the display and controller ports. A 5-minute first check should include confirming these connections. Incorrect wiring or loose connections can lead to a non-functional display or inaccurate readings. Always refer to your e-bike’s wiring diagram for specific connection details.
Checking Display and Controller Connections
A systematic check of the display and controller connections is the first step in troubleshooting. Begin by visually inspecting the connector for any physical damage, bent pins, or debris. Gently disconnect and reconnect the cable, ensuring a firm and secure fit at both ends. Pay close attention to the locking mechanism, if present.
Use a multimeter to test the continuity of each wire within the cable, verifying there are no breaks or shorts. Confirm the voltage at the connector is within the specified range. Loose or corroded connections are common culprits for display malfunctions. A thorough inspection, as part of the 5-minute first check, can quickly identify and resolve connection-related issues.
Troubleshooting: Display Not Turning On
When your e-bike display fails to power on, a methodical approach is essential. First, verify the battery is fully charged, as a depleted battery is a frequent cause. Next, inspect the fuse – a blown fuse will immediately prevent the display from functioning. Carefully check all wiring connections between the battery, controller, and display, ensuring they are secure and free from corrosion.
If the connections appear sound, consider the possibility of a faulty display or controller. A video guide can walk you through these steps. Common causes include power issues, loose wiring, or a defective USB cable. Remember to rule out simple fixes before assuming a more complex hardware failure.
Common Display Issues and Solutions
E-bike displays can encounter various problems. Erratic behavior often stems from software or firmware glitches; outdated systems can cause unpredictable readings. Addressing this requires software updates, if available. Display freezing or lagging suggests a processing overload or communication error. Try cycling the power – turning the bike off and on – to reset the system.
Loose connections are a frequent culprit for intermittent display failures. Inspect all wiring carefully. If the screen exhibits distorted visuals, a hardware fault might be present. Many minor issues, like a shifted cable or a nearly empty battery, are easily resolved by the owner. However, complex problems may necessitate professional service.
Addressing Erratic Display Behavior
Erratic display behavior on your e-bike often points to software or firmware inconsistencies. Modern e-bike displays heavily rely on these, and outdated versions can trigger unpredictable readings or glitches. The first step is to check for available updates from the manufacturer; these often resolve known bugs and improve stability.
If updates aren’t available, a complete power cycle – turning the bike off and then on again – can sometimes reset the system and clear temporary errors. Inspect the connections between the display and the controller, ensuring they are secure. A low battery can also contribute to unstable operation, so confirm a full charge. If the problem persists, it could indicate a more serious hardware issue.
Fixing Display Freezing or Lagging
Display freezing or lagging on your e-bike can be frustrating, often stemming from software overload or communication issues. Begin by performing a full system reset – power off the bike completely, wait a minute, and then turn it back on. This clears the display’s cache and restarts processes.
Check for firmware updates, as these frequently include performance enhancements and bug fixes. Ensure the battery is adequately charged, as low power can hinder processing speed. Inspect the wiring connecting the display to the controller for any loose connections or damage. If the issue continues, consider whether multiple simultaneous data requests are straining the system. A professional diagnosis might be needed to identify underlying hardware limitations.

Software and Firmware Updates
Modern e-bike displays heavily rely on software and firmware for optimal performance. Regularly updating these components is crucial for maintaining functionality and addressing potential issues. Updates often include bug fixes, performance improvements, and new features, enhancing the overall user experience.
Manufacturers frequently release updates to resolve erratic display behavior and improve system stability. Check the manufacturer’s website or app for available updates and follow their instructions carefully during the installation process. A stable internet connection is usually required. Ignoring updates can lead to compatibility problems and reduced display responsiveness. Prioritize updates to ensure your e-bike’s display operates smoothly and efficiently.
Why Updates are Important
Firmware and software updates for your e-bike’s LCD display are vital for several reasons. They address bugs that can cause erratic behavior, freezing, or lagging, ensuring a smoother and more reliable user experience. Updates often enhance compatibility with other e-bike components, like the controller and battery management system.

Manufacturers continually refine their software to improve performance and introduce new features. These updates can optimize power consumption, leading to increased battery life. Furthermore, they often include security patches, protecting your e-bike from potential vulnerabilities. Ignoring updates can leave your display susceptible to malfunctions and limit access to the latest improvements. Keeping your software current is a proactive step towards a safer and more enjoyable ride.
Display Customization Options
Modern e-bike LCD displays often offer a range of customization options to tailor the riding experience. Users can frequently adjust units of measurement, switching between miles per hour (MPH) and kilometers per hour (KMH). Brightness and contrast settings allow for optimal visibility in varying lighting conditions, enhancing readability during both sunny and nighttime rides.
Many displays permit the re-arrangement of data fields, prioritizing information like speed, battery level, or distance traveled. Some advanced models support custom themes or color schemes, adding a personal touch. Furthermore, certain displays allow riders to adjust the backlight timeout duration, conserving battery power when the display isn’t actively viewed. Exploring these options ensures the display presents information in a clear and convenient manner.
Interpreting Error Codes
E-bike LCD displays frequently utilize error codes to signal malfunctions within the system; These codes, displayed as alphanumeric sequences, pinpoint specific issues, aiding in diagnosis and repair. A common code might indicate a communication error between the display and the controller, suggesting a wiring problem or controller fault. Others may relate to motor issues, battery problems, or sensor failures.
Consulting the e-bike’s specific manual is crucial, as error code meanings vary between manufacturers and models. Ignoring error codes can lead to further damage or unsafe riding conditions. Some displays offer a brief description alongside the code, while others require referencing a separate code list. Addressing these codes promptly ensures continued safe and reliable operation of the e-bike.
DIY Display Repair vs. Professional Service
Attempting DIY repairs on an e-bike LCD display can be tempting, especially for minor issues like loose connections or simple wiring fixes. However, complex problems, such as internal component failures or firmware corruption, often require specialized tools and expertise. Incorrect repairs can void warranties and potentially cause further damage to the display or the entire e-bike system.
Professional e-bike technicians possess the knowledge and equipment to accurately diagnose and repair display issues. They can perform firmware updates, replace damaged components, and ensure proper functionality. While professional service incurs a cost, it offers peace of mind and a higher likelihood of a successful repair. Consider your skill level and the complexity of the issue before deciding between DIY and professional assistance.
Display Maintenance and Care
Regular maintenance extends the life of your e-bike LCD display. Keep the display clean by gently wiping it with a soft, damp cloth. Avoid harsh chemicals or abrasive cleaners, as these can damage the screen’s coating. Inspect the display connections periodically to ensure they are secure and free from corrosion. A loose connection can cause intermittent display issues or complete failure.
Protect the display from extreme temperatures and direct sunlight for prolonged periods. Exposure to these elements can degrade the display’s performance and lifespan. If your bike is stored outdoors, consider using a protective cover. Addressing minor issues promptly, like a flickering screen or sluggish response, can prevent more significant problems from developing.
I2C LCD Integration with VESC
Integrating an I2C LCD with a VESC (Vedder Electronic Speed Controller) allows for real-time monitoring of crucial e-bike data directly on the display. This setup typically involves an Arduino-based project to bridge communication between the VESC and the LCD screen. The Arduino code interprets data from the VESC, such as speed, battery voltage, current, and motor temperature, and then displays it on the I2C LCD.
Successful integration requires proper wiring and configuration of both the Arduino and the VESC. Ensure correct I2C addressing and data transmission protocols are established. Numerous online resources and code repositories offer pre-built solutions and guidance for this integration, simplifying the process for enthusiasts and developers.
Future Trends in E-Bike Display Technology
The evolution of e-bike displays is rapidly advancing, moving beyond basic LCD screens towards more sophisticated and integrated systems. Expect to see increased adoption of TFT (Thin-Film Transistor) displays offering vibrant colors and higher resolutions, enhancing readability and user experience. Advanced features like GPS navigation, smartphone connectivity, and customizable dashboards are becoming increasingly common.
Connectivity will play a key role, with displays seamlessly integrating with mobile apps for data logging, ride analysis, and remote control. Firmware updates will become more frequent, addressing bugs and introducing new functionalities. Potential trends include head-up displays (HUDs) projecting information onto the rider’s field of vision and energy-efficient e-paper displays for extended battery life.
Advanced Features and Connectivity
Modern e-bike displays are evolving beyond simple speed and battery indicators, incorporating advanced features for a richer riding experience. GPS integration allows for navigation and ride tracking, while Bluetooth connectivity enables seamless pairing with smartphones. This connectivity facilitates data synchronization, firmware updates, and remote control of display settings via dedicated mobile applications.
Customizable dashboards empower riders to prioritize information, displaying metrics like cadence, power output, and distance traveled. Some displays offer smart features like call and message notifications, enhancing convenience. Future advancements may include integration with fitness platforms and over-the-air software updates, ensuring displays remain current with the latest features and security enhancements.